The recent hurricanes and the disruptive effects of extreme weather brought back unpleasant memories of being without power for 3 days after a very severe snowstorm hit my area (Western Pennsylvania) in February of 2010. It was uncomfortable, inconvenient, and the uncertainty as to when power will be restored is unsettling. Not to mention, for a guy who really likes electronics it was a major bore! I’ve been thinking of installing a standby generator for years, but don’t experience power losses very often in my new home and the weather has been mild the past few years. It was hard to justify $2,000 for the generator and another $1,000 for installation given how infrequently I experience a sustained power outage, and the standby generator could sit outside for years and just be something extra to maintain before it ever made a difference.
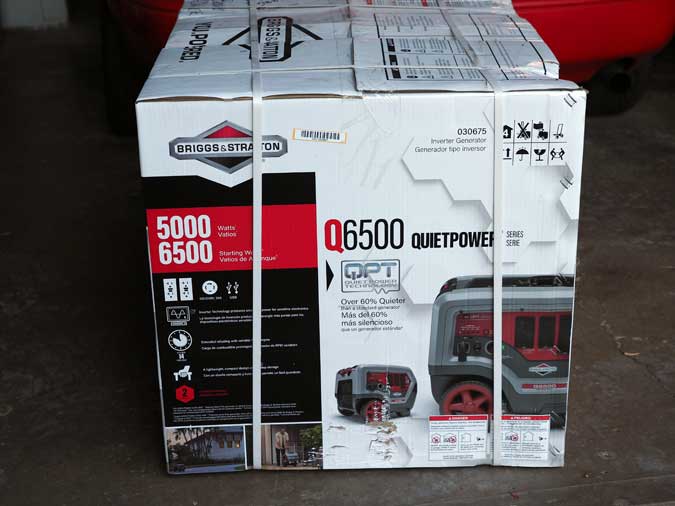
The new $1,499 Briggs & Stratton QuietPower Q6500 Inverter Generator proved to be what I was waiting for. Not only did it produce enough clean power to power almost my whole home, I could use it for other things besides backup power, for example powering my electric leaf blowers and hedge clippers. I would not have to run natural gas lines, and a manual transfer switch would provide flexibility in choosing what household circuits I want to power.
My purpose here is not only to review this excellent generator, but to show how easy it is to set up backup power for your own home. All you need is a generator, a transfer switch and a few hours of time from your electrician.
Inverter technology and clean electrical power
Most portable generators take power right off the alternator and send it to the outlets with a minimum of filtering or regulation. This power can experience spikes and voltage fluctuations, which can damage sensitive electronics. Though some people get away with it without incident, if you use an ordinary portable generator with your computers, televisions, and other sensitive electronics you run the risk of damaging or destroying them from this “dirty” power. As I said, lots of people seem to get away with it, but for every few people I found who didn’t have any issues I found someone who fried a television. In short, I don’t think it is worth the risk.
An inverter generator takes the power from the alternator, converts it to DC (direct current) and then precisely converts it back to AC (alternating current) again before sending it to the outlets. Converting to DC and back to AC again is what gives inverters their name, and the clean power they produce as a result is safe for electronics as well as anything else powered by AC wall current. Inverters are also quieter and more fuel efficient than conventional generators. The only drawback is the higher cost, though I firmly believe it is worth it, especially for the Q6500 which is very affordably priced for an inverter with 5,000 continuous watts and 6,5000 starting watts.
Transfer switches vs. extension cords
You can run extension cords from your generator outside to the inside of your home, but this is a very inelegant solution with power cords running all over the house and a limited number of devices receiving power. There are also safety ramifications from open doors and windows and carbon monoxide from the generator.
A better solution is to have a manual transfer switch with inlet box installed in your home. In the event of a power outage you go to your electrical panel and flip the switch to the generator position, plug the generator into the outside inlet and start it. Power will now be sent over your home’s electrical wiring, just as if power never went out at all, though there may be limitations as to how many circuits can be powered by the generator. The Q6500 provides more than enough current for the furnace fan, refrigerator, lights in several rooms, television and Internet, and a microwave… enough to comfortably ride out the storm. If you have a heat pump or electric heat you may require a bigger generator, or not be able to power as many circuits as a natural gas home such as mine. With my gas range and furnace, the Q6500 powered pretty much my entire house (about 3,000 square feet) easily. I don’t plan on ever running the air conditioner with it, though. If you want whole-house power with no limitations you should look for a standby generator with 10,000 watts or more, depending on the size of your home and what you need to power with it.
Cost considerations
Home backup power does not have to be expensive. While I highly recommend the Q6500 and the installation here is top-of-the-line for a portable generator backup solution, you could also do it with a $450 generator and a $250 transfer switch. You just won’t be able to power as much of your home from a less powerful generator, and the power from the generator won’t be guaranteed to be electronics-safe so you should refrain from using TVs, computers, etc. Still, it is nice to have the refrigerator, lights and the heat on, isn’t it?
The short version
- Buy the generator and put oil and gas in it.
- Buy a manual transfer switch and have your electrician install it, along with an outdoor inlet box.
- When the power goes out, flip the transfer switch, plug the generator into the outdoor inlet box, then start the generator . This will restore power to the selected circuits in your home.
It’s that easy, folks, and provides such safety and security that I think everyone should have a setup to do this.
The detailed version
Here is everything from start to finish.
Unboxing the QuietPower Q6500
The Q6500 was delivered on a pallet. To get it out of the box, just cut the straps and lift off the top and sides. It can then be rolled out of the bottom part of the box without much effort. You just need to extend the handle, lean it back on its wheels and push hard to get it out.
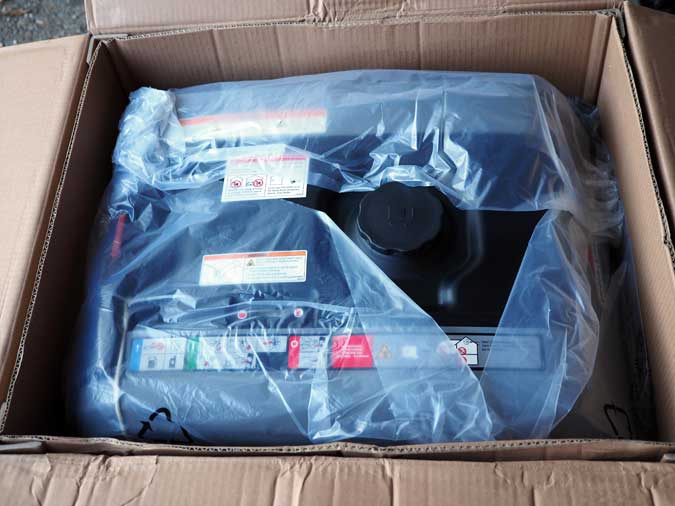
The generator comes fully assembled and all you have to do is add oil. I’ve put together some inexpensive generators for family members before and in some cases it was quite difficult to do, with instructions and diagrams that were not clear. I was very happy to be presented with a product that was almost ready to use, straight out of the box.
Adding oil
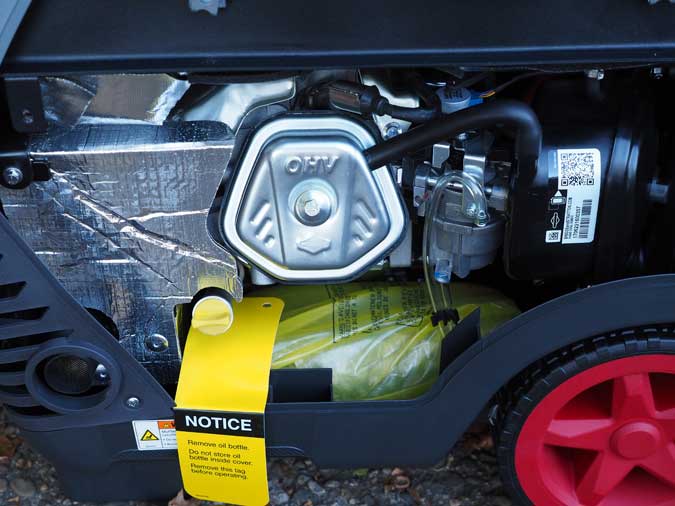
The generator comes with a bottle of SAE 30 oil squirreled away inside the generator.

You remove the maintenance panel (a simple, easy task involving three Phillips-head screws) and pull the bottle out.
A funnel is included for adding oil. Be sure to hang on to it as you need to change the oil periodically, and adding oil without the specialized funnel would be difficult.
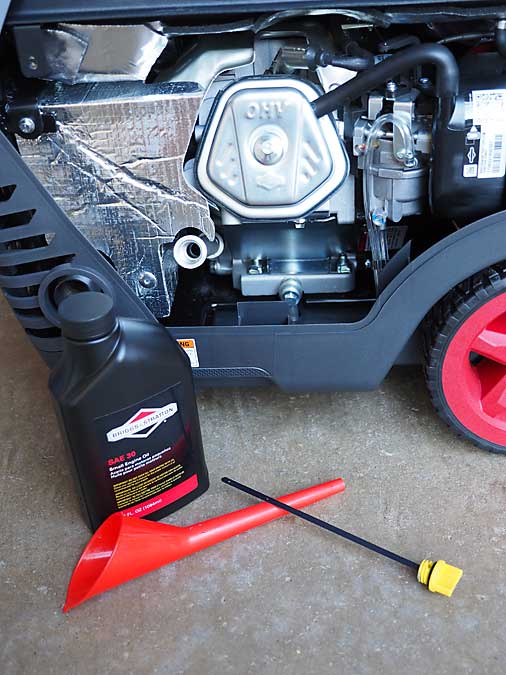
Remove the dipstick and add the oil. It takes a bit less (1 oz.) than the full bottle, so be careful and do not overfill.
Two pieces of advice for adding oil: 1) push that funnel in there nice and tight so it does not leak, and 2) pour slowly. I had a little bit of oil leak out because I did not have the funnel inserted tightly enough.
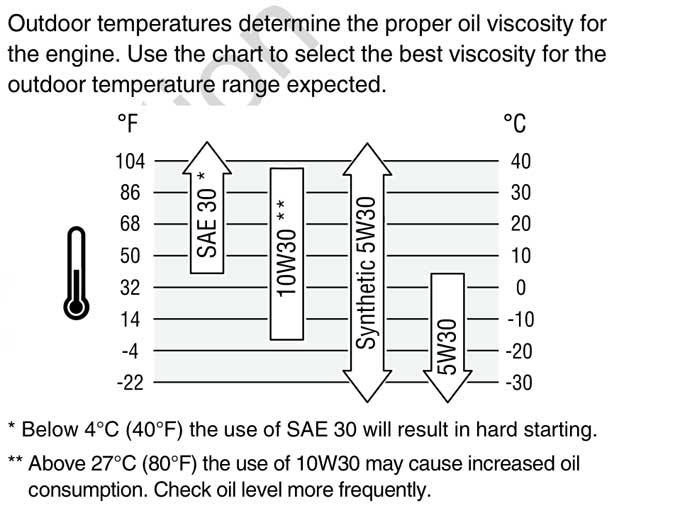
As you can see from the above chart from the owner’s manual, 5W30 synthetic will work in all temperature ranges from -22F to +104F, and the included SAE 30 is only good from only from +40F to +104F. Since one of my applications for the generator is restoring power during winter storms, the SAE 30 oil is inadequate. Had I known I would have bought some synthetic 5W30 before the generator arrived and used it from the start. For now I put in the 30W, and since I will be using the generator for fall leaf cleanup it will get some use in warmer temperatures. The SAE 30 will stay in as break-in oil for the first few hours, after which I will change it to 5W30 synthetic. Perhaps in the future Briggs & Stratton can include their 5W30 synthetic instead of SAE 30 so all temperature ranges are covered, right out of the box.
Adding gas
The Q6500 gas tank holds 5 gallons of gasoline. I recommend a large funnel, as well as the EZ Pour Spout if you can use it with your can and if it is legal in your state.
The gas cap was VERY hard to remove the first time I unscrewed it. I finally got it off but needed a towel to improve my grip, as well as a lot of hand strength.
Later on I will discuss fuel purchasing and storage.
Installing the transfer switch
![]()
I have been working with electrician Denny Molyneaux for years here in Pittsburgh, and have been very happy with his work. If you need electrical work send him an email, you will be glad you did! He did a masterful job on my transfer switch, and his rates are extremely reasonable.
![]()
I chose a transfer switch from Reliance Controls, based on the positive reviews I saw everywhere. I can see why they are so universally praised. It was pre-wired and the components were all of extremely high quality.
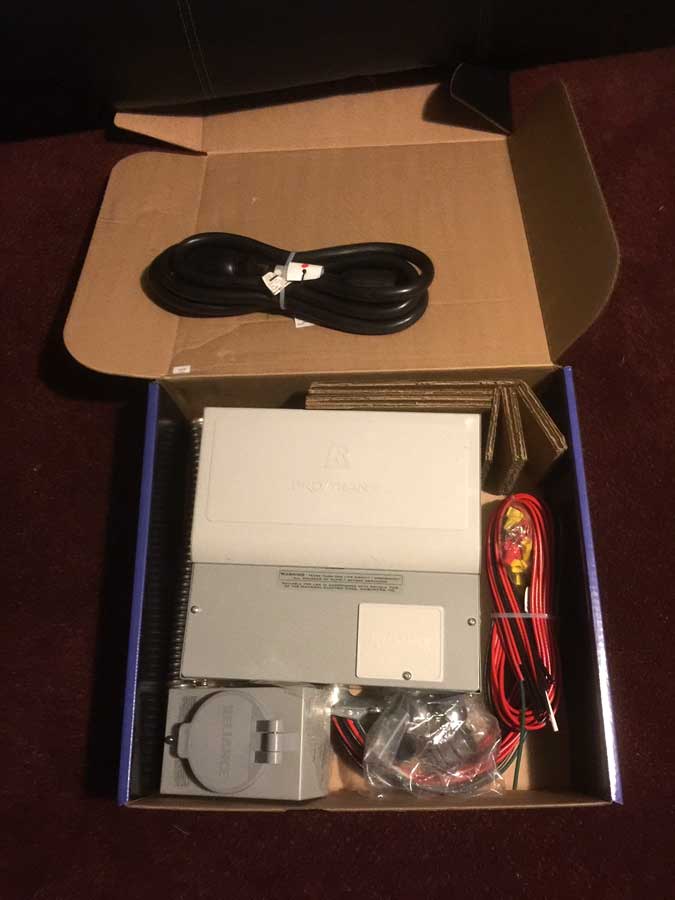
The 10-circuit switch I bought was $399 and included the inlet box and a heavy-duty cord to connect it to the generator’s 240V outlet. Your electrician will need to furnish the heavy-duty, outdoor-rated wire to connect the inlet box outside to the transfer switch inside.
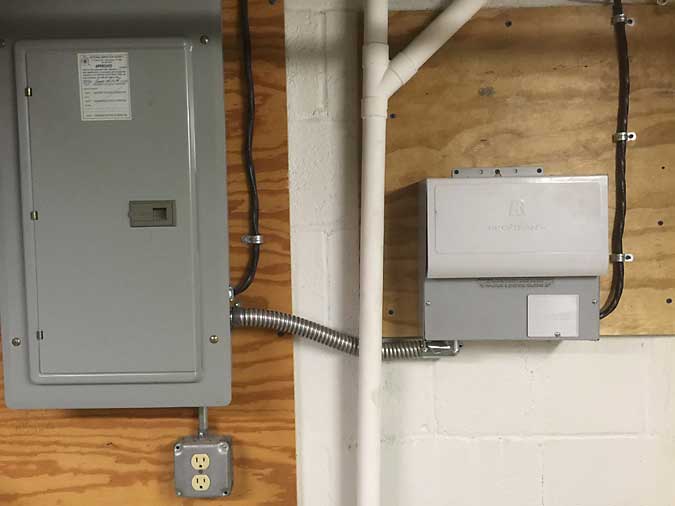
Above, you can see the installed switch, and below, the installed inlet box. As always, Denny did a wonderful job!
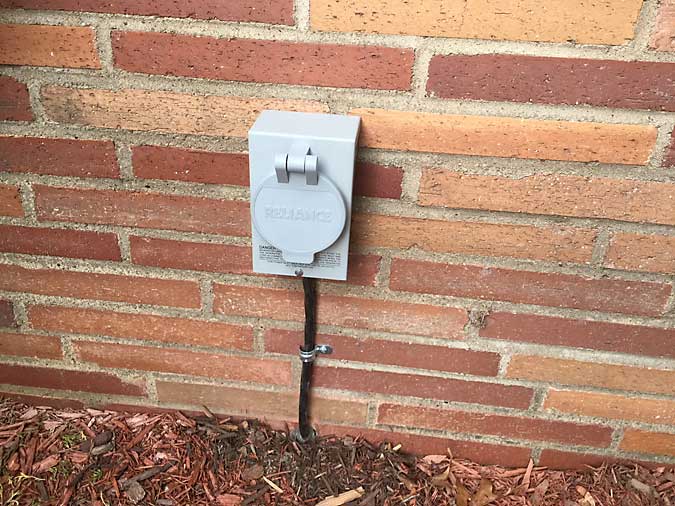
Connecting the generator to the inlet box
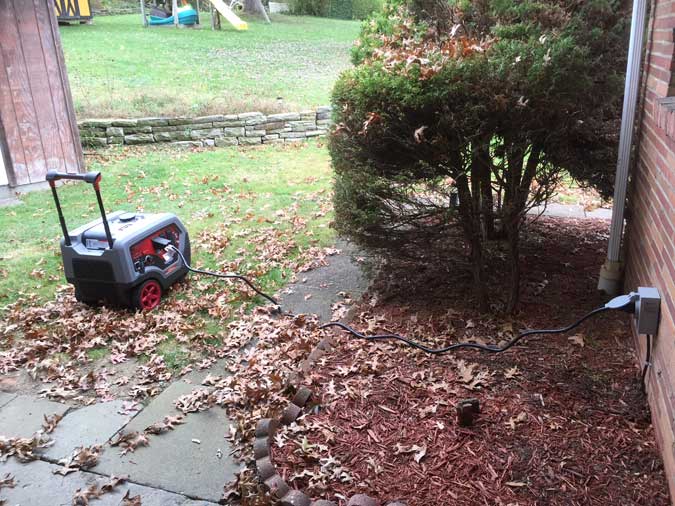
The male end of the cable plugs into the generator, the female end into the inlet box. Longer cables are available from Reliable Controls, though you will lose a volt for every 10 feet. Be sure to point the exhaust away from your home or where people might be exposed to exhaust fumes.
Starting
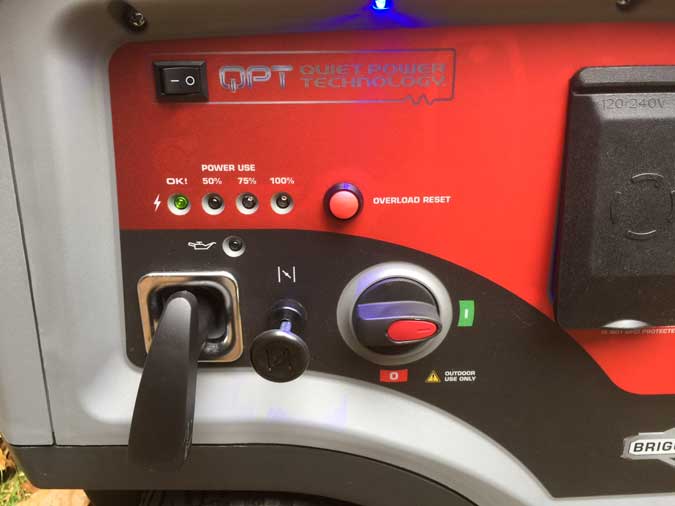
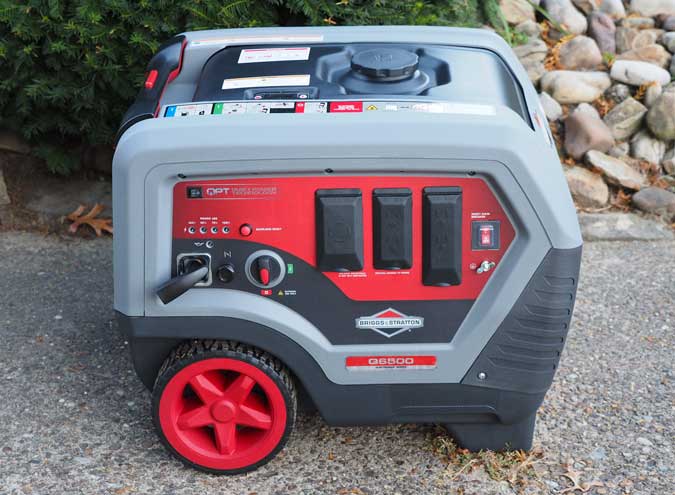
To start, pull out the choke, turn the QuietPower switch to off, and the engine switch to on. Pulling the starter takes a bit of effort, but not much more than a lawn mower. The first time I tried to start the generator the first 8 or 10 pulls were unproductive, perhaps because fuel was working its way though the system. After these first pulls you could hear the engine try to come to life, but did not quite get running. With the next pull, as I heard the engine start to turn over I slowly adjusted the choke to the halfway point. As I adjusted the choke the engine started puttering and quickly fired up, at which point I pushed the choke in all the way. Using this technique the engine now takes no more than two pulls to start. The first pull is at full choke, then on the second pull when I start hearing the engine try to run I adjust the choke to the halfway point and it immediately fires up. After it has run for a few seconds I push it in all the way and it quickly settles into a solid, smooth idle.
Here is a video showing the difference between QuietPower and full-power operation. As you can see, it is pretty quiet for a generator, especially at idle.
Once the generator has warmed up you should turn on QuietPower, which will adjust the generator speed according to the electrical load, which will save fuel and result in quieter operation.
Operating the switch
![]()
Denny labeled the different circuits according to what they will power in the home. As you can see, I used 7 circuits. The 6-circuit switch kit is $299, so I could have saved $100 if I was willing to hook up one less circuit, but I like having everything connected and I have room to expand should I need it.
![]()
You select the power source for each circuit by switching between LINE (utility power) and GEN (generator.) In the image above, the first 7 are set to LINE. When the power goes out I am going to just flip them all to GEN and keep my eye on other houses on the street to see when the power comes back on. Some users will leave one lamp or room light set to LINE so they know when the power comes back on. The last 3 circuits are unused so the circuit breakers and switches are all set to off.
My first time running under generator power
It was somewhat remarkable the first time when Denny and I flipped the transfer switch, plugged in the generator and fired it up. There was power in the house, as expected, and it was exactly as if the power coming from the electric company. Everything worked, the lights were on at full brightness and you would never have guessed that anything was unusual at all. It was almost as if I was expecting it to be somewhat different, though I knew going in that the inverter generator provides perfectly clean power and plenty of it. Perhaps it was the knowledge that my house was off the electric grid at that moment, and the tiny generator outside was providing all the electricity.
Operational and safety considerations
Carbon Monoxide
You need to be careful where you set up the generator to ensure you don’t send carbon monoxide in your home. Install carbon monoxide detectors in your home and when you set up the generator, make sure the exhaust is pointed away from your home or others’ homes in close proximity to the exhaust.
Grounding
The Q6500 has a grounding post, though Briggs & Stratton says using it is not mandatory. Many other generators require grounding, and it is required in some areas due to local codes and laws. Be sure to check with the local authorities to see if your generator must be grounded. My local laws do not require grounding, but in the past I have grounded generators that require it by using a heavy-gauge wire connected to a post driven into the ground. Check your generator’s user manual to see what kind of solution is recommended for grounding.
The GenTent
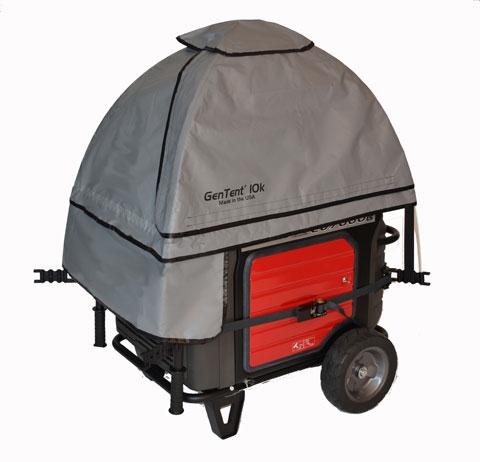
I also suggest you use a GenTent. Generators run at high voltages and have a lot of sensitive parts, and the GenTent Safety Canopy will help keep it out of the elements, especially since you should not use a generator in an enclosed area like a porch. It is rated to stay put in winds up to 70 mph and snow up to 18 inches.
I recently obtained a GenTent and will be reviewing it separately.
Gasoline purchasing and storage
I don’t know anyone who likes the abomination that is the “spill-proof” EPA gas can. They tend to guarantee a spill, not prevent them. It is probably easiest and safest to unscrew the cap of these horrible devices and use a funnel to add fuel to your lawn mower, or in this case, your generator, than try to get one of those things to dispense fuel without getting it everywhere. I investigated the EZ Pour spout, which converts an EPA can (made before 2009, according to the manufacturer) to an ordinary gas can. It was not the path I chose to take, but if you choose to perform some civil disobedience by converting your EPA “sure-spill” cans into an ordinary gas can with an EZ Pour Spout, I can certainly understand where you are coming from. It’s an insane and meaningless regulation that does far more harm than good, and if President Trump hates government regulation as much as he says he does I suggest he start here and bring back the ordinary gas can.
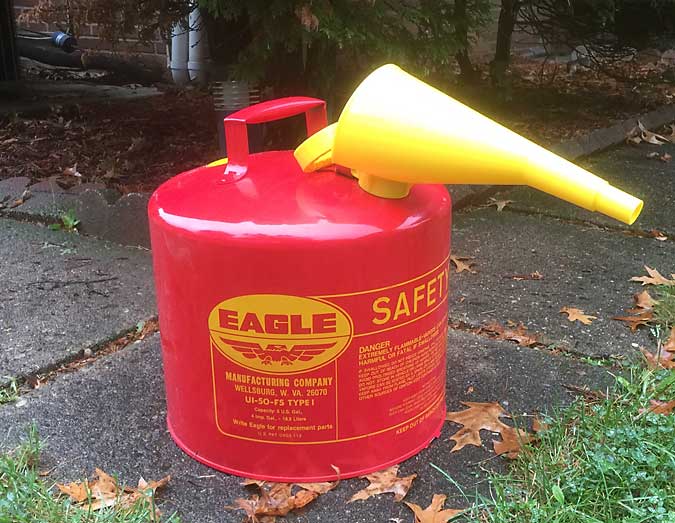
Rather than get cheap plastic cans and EZ Pour Spouts I decided to bite the bullet to the tune of $50 apiece for Eagle 5-gallon metal safety cans.

Eagle cans have a built-in funnel and a mechanism that is easy to use and does not spill fuel, and they are made here in the USA. Just squeeze the handle to open the top, and the funnel will get the gas where it is supposed to go without spilling. With two of these beauties and a generator full of gas, I have 15 gallons total capacity which will keep the power on for at least 24 hours. I thought about buying 3 cans, but if a bad storm takes out the power for a sustained period of time and I get down to my second can, I will just go out and buy more gas.
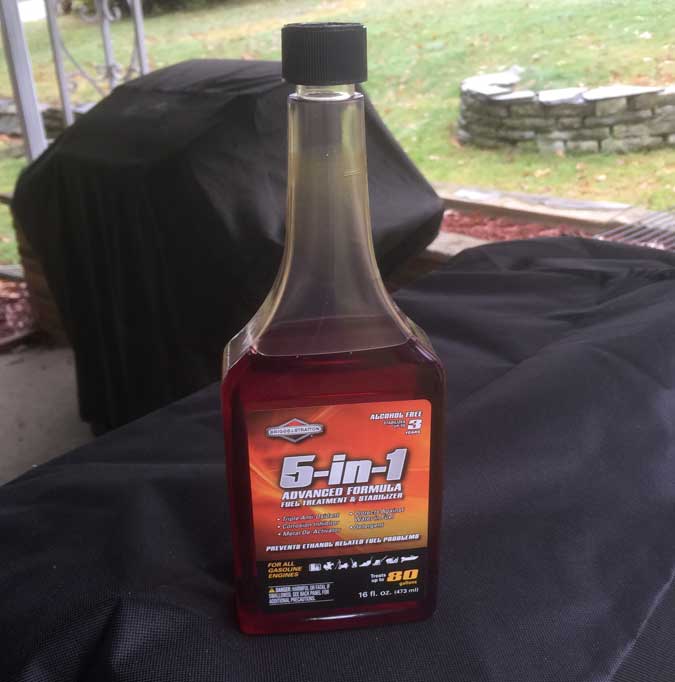
Fuel stabilizer is a must! I chose another Briggs & Stratton product for fuel stabilization due to its amazing long life capabilities.
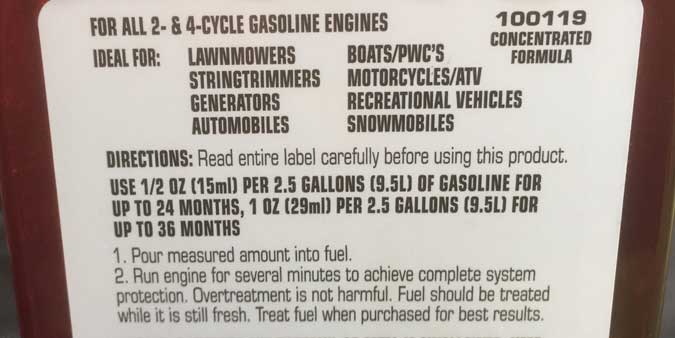
As you can see from the chart above, you can stabilize fuel for up to 36 months by increasing the amount of stabilizer added per gallon.
I’ll rotate the stored gas between my lawn mower and generator to ensure it stays fresh, and run the generator at least once a month to keep it lubricated and in fine running shape.
Duplicating my setup
If you want to duplicate my setup, this is what you will need:
Generator
Briggs & Stratton QuietPower Q6500 Inverter Generator $1,499
See the generator at briggsandstratton.com.
Some Amazon retailers are charging over the $1,499 retail price, due to high demand. If you can’t get a deal on Amazon then Home Depot seems to always have it for $1,499 though you may have to order it and wait.
It’s pretty heavy at 148 pounds so I suggest letting them deliver it, if it is a free option.
Transfer switch
Reliance Controls 10-circuit Indoor Transfer Switch with Outdoor Inlet Box $399
Fuel and oil supplies
(2) 5-gallon Eagle gas cans $50 each
(2) bottles Briggs & Stratton 5W30 synthetic oil $13 each
Briggs & Stratton 5-in-1 Fuel Stabilizer $8.99
Gentent
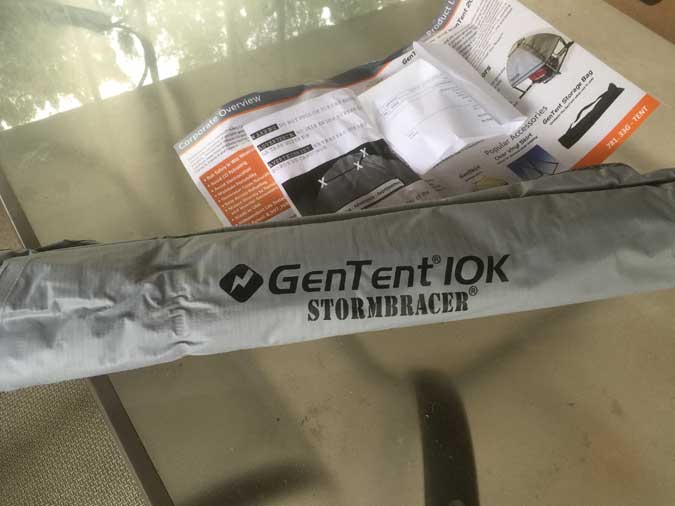
GenTent 10k XKu Stormbracer $165
Final thoughts
This easily ranks as the best home improvement project I have ever done. Remembering that miserable winter storm of seven years ago and the resulting three days without power, the shivering in bed curled up with my dog Gabby, the incredibly dark nights, the eerie quiet of it all, the uncertainty of not knowing when the power would be back, having my life put on hold until things got restored to normal by the authorities and the electric utility, the helplessness that I felt… now I knew I would never have to experience that again.
It’s kind of corny to say it, but having a generator for a home back-up is… empowering!